Creating a chatbot – Designing for Interoperability
To receive messages sent from the ESP32 based on the motion caught by the motion sensor, we have to first create a chatbot on the Telegram app:
To start off, we need to download the Telegram app. We can go to Google Play or the App Store and download and install Telegram from there:

Figure 8.3 – Downloading the Telegram app from the App Store
Open Telegram after it has finished installing, search for Botfather, and click on it. Alternatively, you can also open the t.me/botfather link on your smartphone:
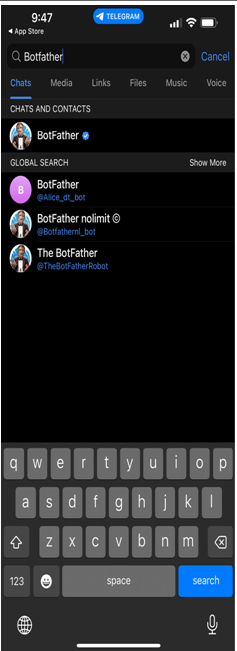
Figure 8.4 – Searching for BotFather on the Telegram app
You will then have a window open and be prompted to click the Start button. Click on it accordingly.
To create your bot, follow the steps by typing /newbot and then completing the required information such as the bot’s name and username. Upon successful creation of your bot, a message including a link and bot token will be sent to you. It’s crucial to save the bot token as it will be required for the ESP32 to communicate with the bot. Navigate to the link to get to your bot on Telegram and click Start to prepare to receive messages on your app:
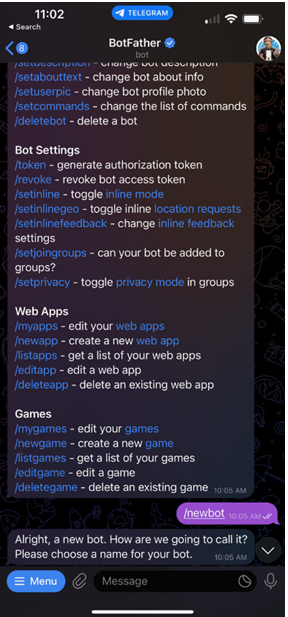
Figure 8.5 – Typing in /newbot to create a new bot
With that, we have created our bot! Now, we need to get a Telegram user ID.
Getting a Telegram user ID
By obtaining your Telegram user ID, you can ensure that your bot only interacts with authorized users. The ESP32 can compare the sender ID of incoming messages to your user ID and either process the message or disregard it, depending on the match. This way, you can filter out any messages that are not from your Telegram account or other approved sources:
To locate IDBot in your Telegram account, either conduct a search through Telegram’s search bar at the top or access this link, t.me/myidbot, through your smartphone.
To obtain your user ID, initiate a conversation with IDBot and enter /getid. You will then receive a response containing your user ID, which should be saved for future reference in this tutorial:
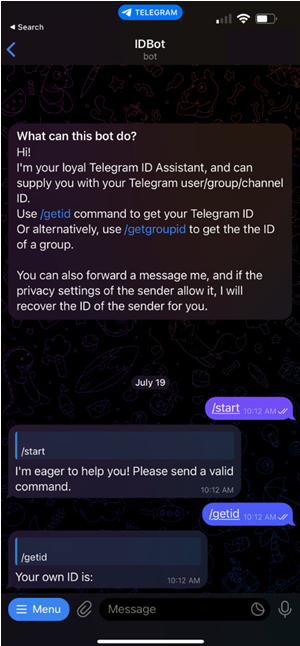
Figure 8.6 – Entering in /getid to see your ID with IDBot
Now that we have obtained our user ID, we can start working on the Arduino segment of the practical.